Quick Start Guide for iOS
Server Version Notice
We recommend using the V2 server (CrimsonLion) for all new integrations.
The V1 server (NyanCat) will be deprecated on August 31, 2026. If you're starting a new project, please use V2. If you have an existing integration using V1, please plan your migration before the deprecation date.
See our V1 to V2 Migration Guide for details.
The quickest and simplest way to kickstart your journey with the iOS SDK is by downloading and experimenting with our sample code. Additionally, you should follow this quick start guide to swiftly create your first vital sign app with iOS.
After you've completed this guide, we strongly recommend you to follow our Software Development Guide to guarantee accurate and reliable health reports generated by the Vitals™ SDK.
SDK Installation
Please follow the instructions in the Downloads page to install and integrate the iOS SDK into your project.
Camera Setup
As outlined in Integrating Vitals™ Health Assessment (VHA), the first step is to setup the camera. To begin, create a new project and follow the instructions below.
Camera Permission
When developing for iOS, you need to allow the app to use the camera by specifying the following in the file Info.plist:
<key>NSCameraUsageDescription</key>
<string>Use for measuring vital signs</string>
TIP
In Info.plist, the string "Use for measuring vital signs" is an example description of the camera usage. You should specify your own description that matches the usage of your application.
Vital Sign Camera
As described in Vital Sign Camera, in Vitals™ SDK, we provide a tailor-made camera component, named VitalSignCamera. To set it up, in your Main.storyboard, drag and drop a View to your ViewController, constraint it to the root view, and set its class to VitalSignCamera. For example:
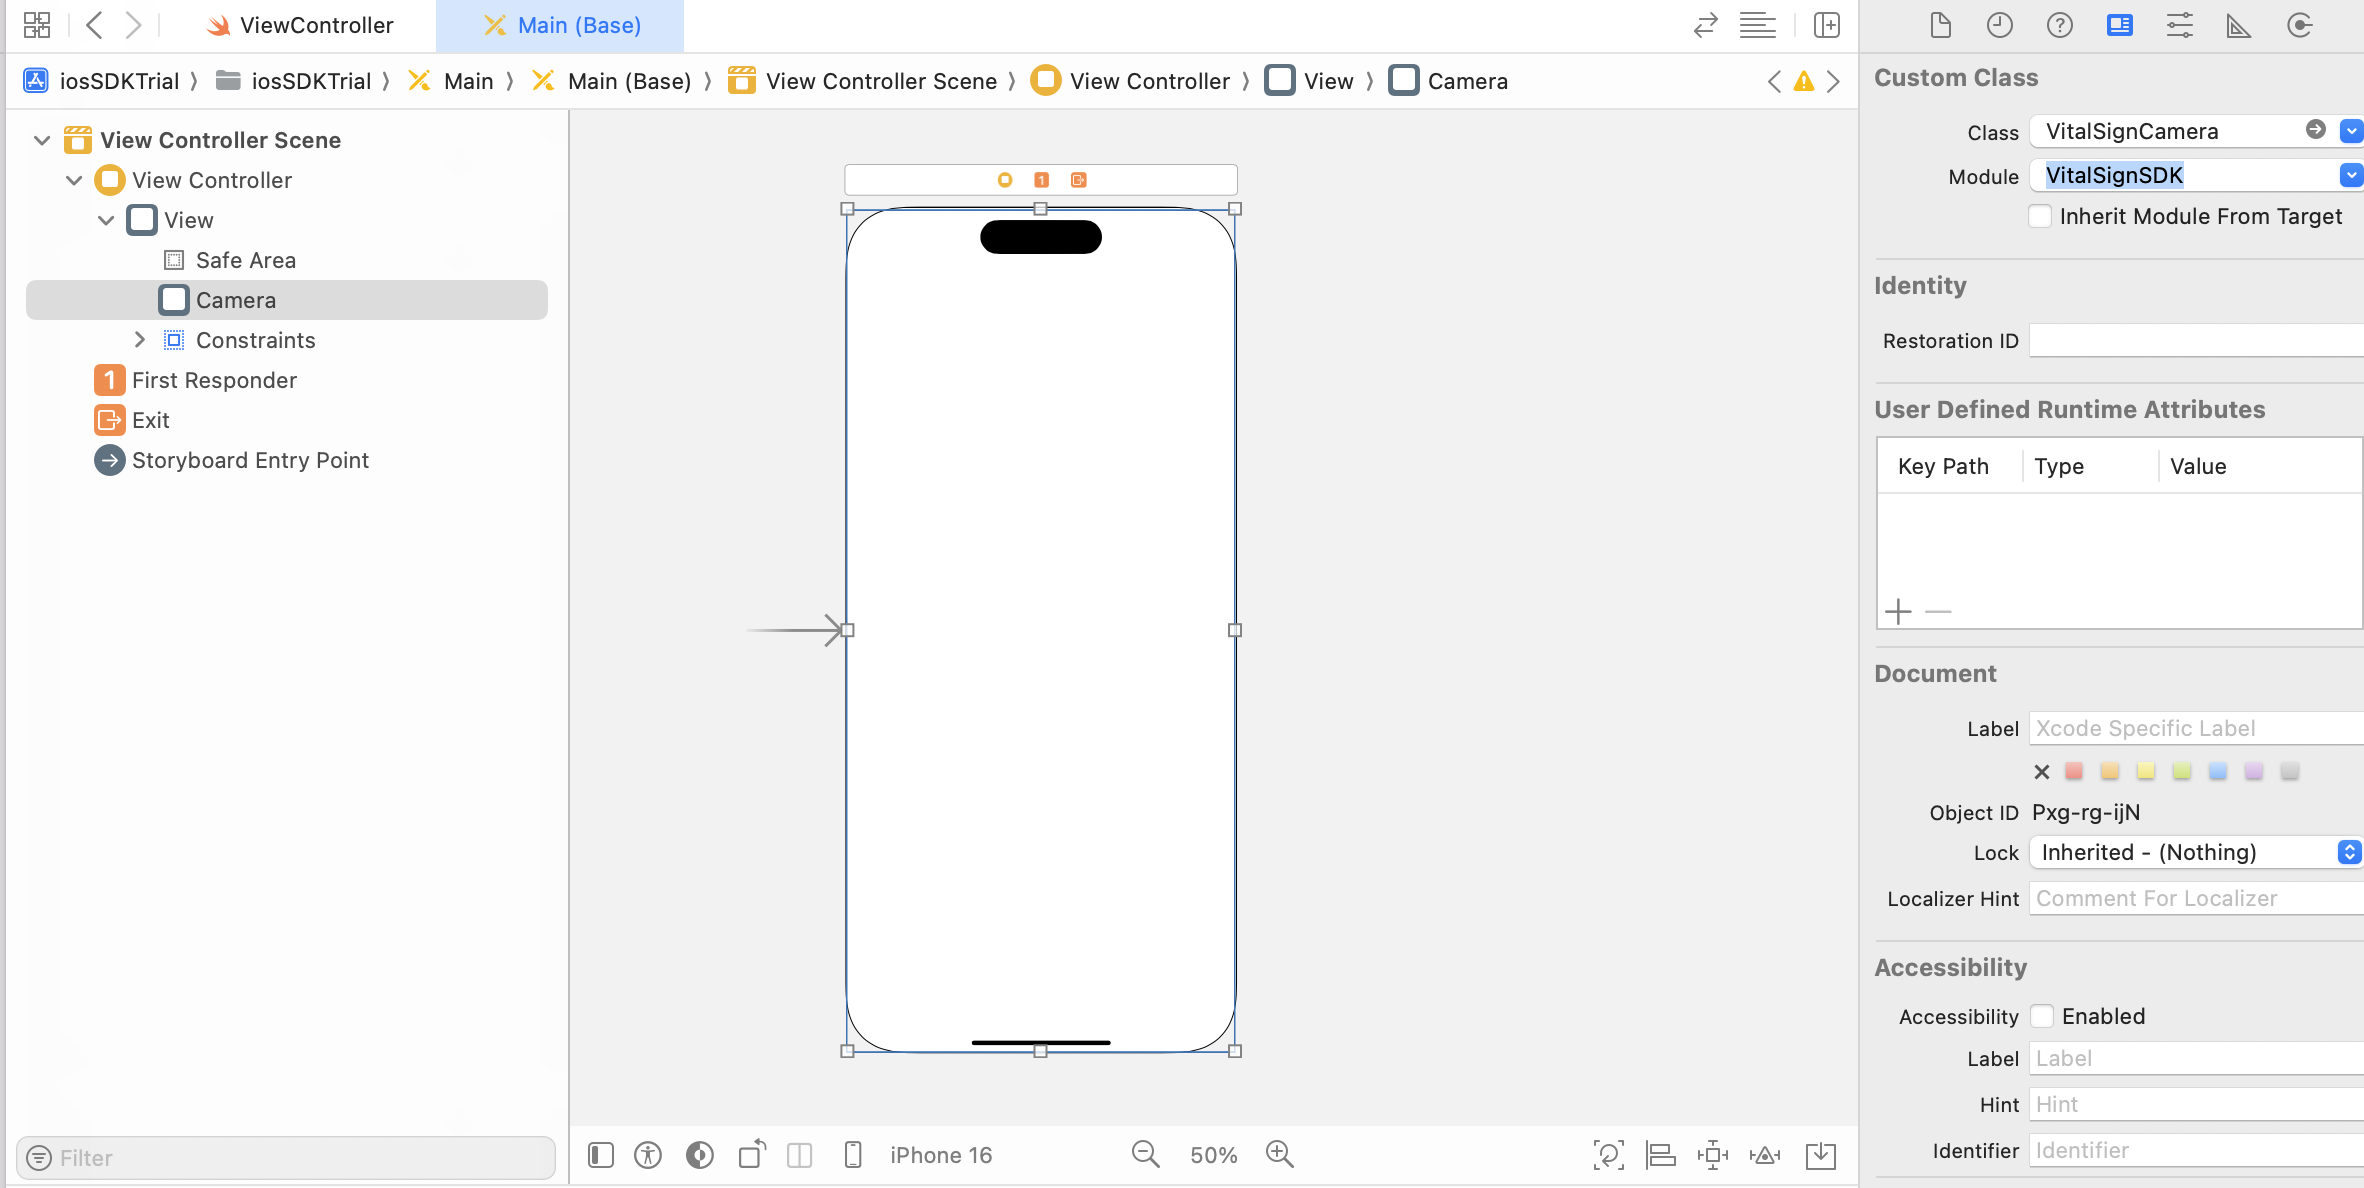
After that, connect the VitalSignCamera view to your ViewController.swift as an IBOutlet. Request camera permission, and configure the camera.
import UIKit
import VitalSignSDK

class ViewController: UIViewController {

    static let API_KEY = "__YOUR_API_KEY__"
    static let USER_ID = "__YOUR_USER_ID__"

    @IBOutlet weak var camera: VitalSignCamera!

    override func viewDidLoad() {
        super.viewDidLoad()
        self.setupCamera()
    }

    private func setupCamera() {
        camera.requestPermission().done { [unowned self] in

            guard $0 else { return }

            self.camera.setup { camera in
                camera.isActive = true
                camera.sdkCredentials = .init(
                    apiKey: Self.API_KEY,
                    userId: Self.USER_ID
                )

        }
    }
}
TIP
In the above example, the strings __YOUR_API_KEY__ and __YOUR_USER_ID__ should be replaced by your own API Key and User ID. Please contact us to obtain your API Key and User ID, which are the credentials for accessing the Vitals™ Cloud Service.
For more details on system and camera setup, please refer to Camera Setup.
Acquire Health Profile
As outlined in Integrating Vitals™ Health Assessment (VHA), user data and medical history data have to be gathered to obtain personalized health insights and enhance the accuracies of measurements.
First, create a UserInfo object with the user information you've gathered.
class ViewController: UIViewController {

    static let USER_ID = "__YOUR_USER_ID__"

    // ...

    private func setupCamera() {
        let userInfo = UserInfo(
            gender: .female,
            age: 30,
            userId: Self.USER_ID )

        // ...
    }
}
You can provide the user information gathered to the Vitals™ SDK by supplying them to the userInfo property in VitalSignCamera within the setup() block. For example:
camera.requestPermission().done { [unowned self] in
    // ...
    self.camera.setup { camera in
        // ...
        camera.userInfo = userInfo
    }
}
Run the app, you should be able to see the camera preview now.
TIP
In the above example, the string __YOUR_USER_ID__ should be replaced by your own User ID. Please contact us to obtain your User ID, which specifies the subscription plan for the Vitals™ Cloud Service. The set of vital signs obtained from a scan varies depending on the licensed subscription plan, with each plan offering a unique set of vital signs.
For more details, please refer to the Acquire Health Profile page.
Scan Vital Signs
To start a scan, you can simply call the startScanning() API of the VitalSignCamera.
First, add a start button in your Main.storyboard:
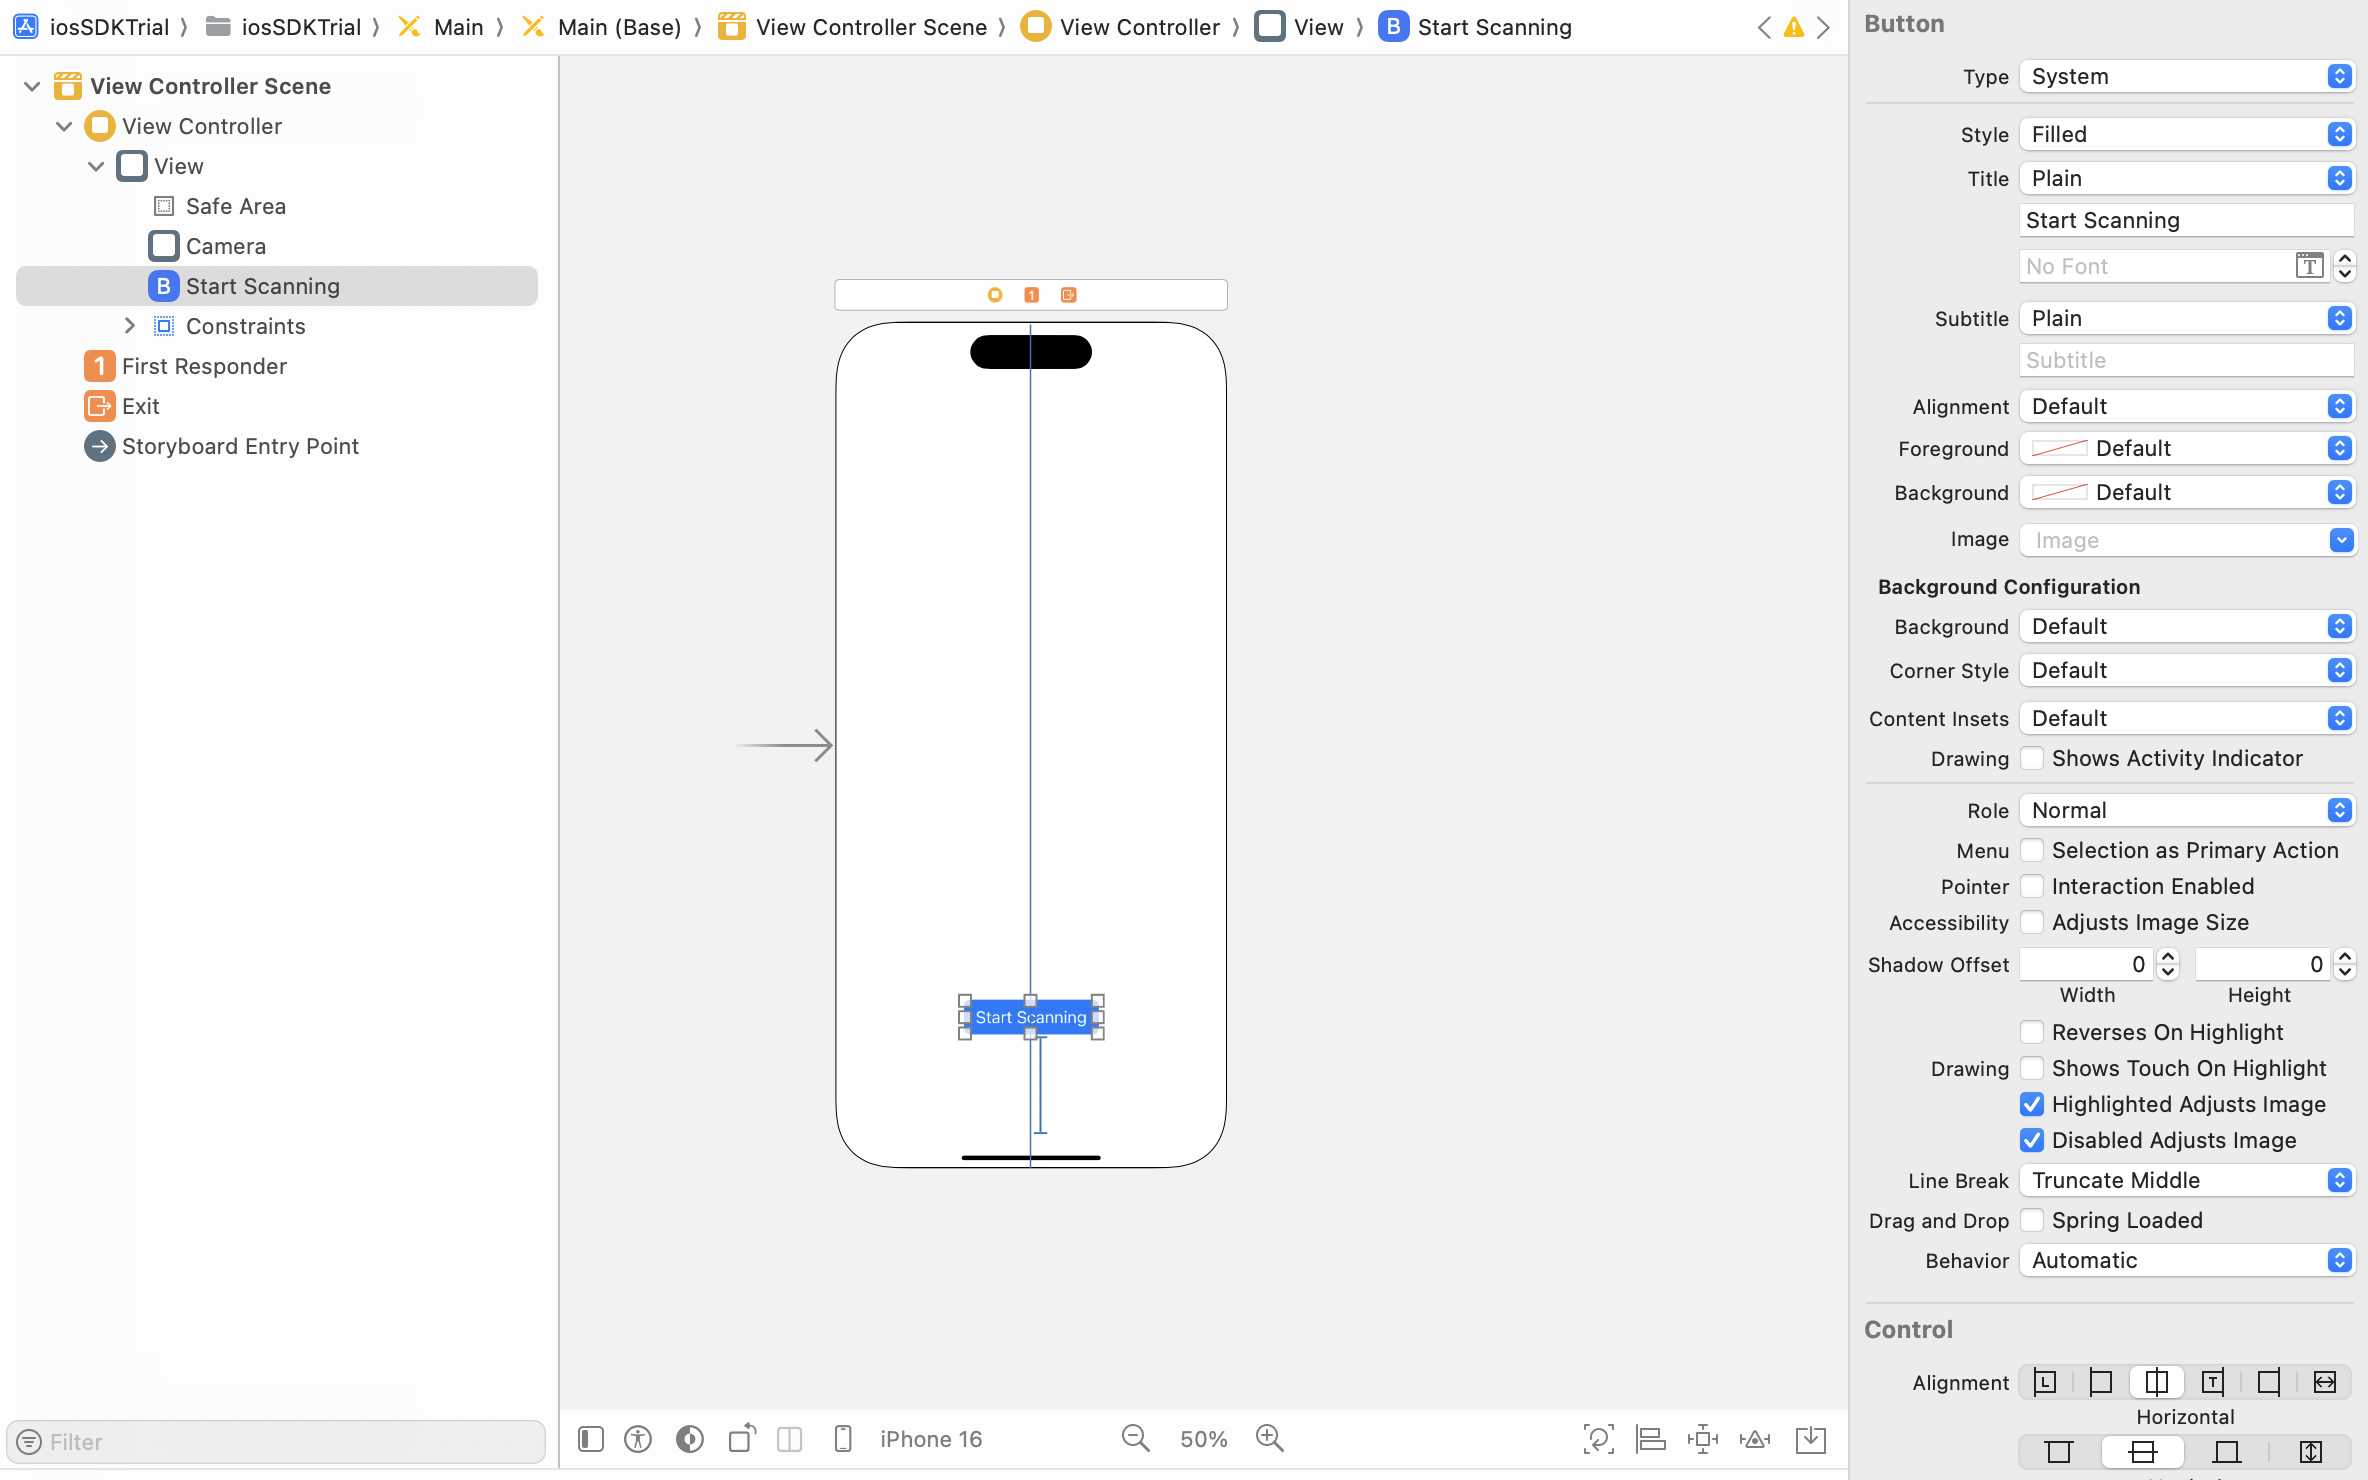
Connect the start button to your ViewController.swift with an IBAction, call the startScanning() API.
class ViewController: UIViewController {

    // The camera reference we've already prepared.
    @IBOutlet weak var camera: VitalSignCamera!

    // ...

    @IBAction func onStartButtonClicked(_ sender: Any) {
        self.camera.startScanning()
    }
}
After calling the API, the widget will start scanning the face from the camera for about 30 seconds. And vital signs will be returned upon successful scan. You can print the scanning progress and observe any error by adding the onVideoFrameProcessed callback argument in VitalSignCamera. This callback function delivers processing results at a rate of 30Hz per second (The rate depends on the frame rate of the camera).
camera.requestPermission().done { [unowned self] in
    // ...
    self.camera.setup { camera in
        // ...
        camera.onVideoFrameProcessed = onVideoFrameProcessed
    }
}
Define the onVideoFrameProcessed to print the scan progress:
func onVideoFrameProcessed(result: ProcessResult) {
    /* Print the scanning stage & remaining seconds if the scan is in progress. */
    if let stage = result.healthResult?.stage,
       stage != .idle,
       let remainingSec = result.healthResult?.remainingTime {
        print("Scanning Stage = \(stage), Remaining Seconds = \(remainingSec)")
    }

    /* Print error if any */
    if let error = result.healthResult?.error {
        print("Error = \(error)")
    }
}
Run the app, with your face centered in the camera frame, click the "Start Scanning" button. Move your face out of the camera frame to simulate a "face lost" error. You should see something similar to this in your console:
Scanning Stage = collectingData, Remaining Seconds = 21.667988061904907
Scanning Stage = collectingData, Remaining Seconds = 21.63428807258606
[VSE Core][ERROR] Face lost
Error = faceLost
Error = faceLost
For more details on handling the scanning process, please refer to the Scan Vital Signs page.
Get & Display Health Results
The VitalSignCamera component returns the health results by the onVideoFrameProcessed callback function. In the example code below, it checks if the heart rate is ready, and display it in the console if it is ready.
/* Update the onVideoFrameProcessed callback function */
func onVideoFrameProcessed(result: ProcessResult) {
    // ...

    /* Obtain the heart rate result */
    if let health = result.healthResult?.health, let heartRate = health.vitalSigns?.heartRate {
        print("Heart Rate = \(heartRate)")
    }
}
Run the app and perform the scan, after 30 seconds, you will be able to see the heart rate result like this:
Scanning Stage = analyzingData, Remaining Seconds = 0.08395302295684814
Scanning Stage = analyzingData, Remaining Seconds = 0.05001401901245117
Scanning Stage = analyzingData, Remaining Seconds = 0.016833066940307617
Heart Rate = 93.03858964365857
Heart Rate = 93.03858964365857
Heart Rate = 93.03858964365857
There are more vital signs available in the Vitals™ SDK and we also provide health result interpretation guides. For more information, please refer to the Get & Display Health Result page.
🎉🎉🎉 Congratulations! 🎉🎉🎉
You have completed your first Vitals™ application!
WARNING
This guide only provides you the minimum viable product (MVP) using our iOS SDK, there are still more features and more things to do to ensure an accurate and reliable measurements by our Vitals™ Cloud Service. For example: performing Conditions Check, using the Signal Quality metric, and more. Please refer to the Software Development Guide page, and the sample code for further details.